Illustration & Visual Narrative's Project I
27/08/18 - 10/09/18
(Week 01 - Week 3)
Fong Ee Xuan (0332842)
Illustration & Visual Narrative
Project I
INSTRUCTIONS
PROJECT
Vormator
27/08/18 - 10/09/18
Week 01 - Week 03
In this few week, we have to design a character by using Vormator elements. In this project, we are allowed to flip, rotate and duplicate the element. Not only that, we also can add, subtract, intersect and group elements as we can fit. Besides that, we also can use gradient and we can use our own colour schemes. But there are also something we are not allowed which are skewing, free transform, scaling without proportionally, use filter and effect in this project.
After we designed our character, we have to laser cut it and also create a Pokemon card which have our character, character's power and so on. For this project, we not only have to design a character, we also have to designing a character who have their personality. So when audience saw it, they already can see what type of character are it.
In the first week, Mr Hafiz taught us trace out Vormator element by using pen tool in Adobe Illustrator.
Figure 1.0: Vormator elements
Figure 1.1: Tracing out the elements
Figure 1.2: Final outcome of it
After we learn how to trace the vormator element, we have to started thinking about the look of our character in the second week. For me, I love dinosaur very much so the first character that I design is a look of dinosaur. This is due I think that there are very cute because they have a small hands even thought they are fierce.
I have design three character for me to choose. The element that I mostly used to design my characters are the zero, drop, badge, bar, cobra and also tentacle.
Figure 2.0: First design's character.
Figure 2.1: Second design's character
Figure 2.2: Third design's character
After designed those character, I choose the first design and this time I change some of it and also add more detail on it. Besides that, I also started to put some colour on it to make it more nice.
Figure 3.0: My final character that I have change

Figure 3.1: The process of creating the detail for my character
Figure 3.2: The details
Figure 3.3: The process of adding colour for it
Figure 3.4: My character after adding colour and details
Figure 3.5: The colour schemes of my character
After designing my character, I started creating a background that we should put in the Pokemon card. At first, I didn't have any idea for the background so I just try out by using pen tool to create some cloud and try to get some idea from it. After getting some ideas and doing some research, I think that the background that full of mountain with sunset view are attractive and eye catching.
Figure 4.0: Some painting that I research for my background
After that, I started creating my background which have green mountain and sunset sky on it. At first I used gradient to create the sunset sky and use three layer to create the mountain after it. Not only that I use the idea that I create cloud to remake a new cloud for my character to step on it.
Figure 4.1: Trying out with some cloud
Figure 4.2: Creating the background step by step
Figure 4.3: Layers of my background
After we design all, we have to make it on a Pokemon card. We have to put the name, power, strength, and some physical detail of our character on the Pokemon card.
The name that I choose for my character is "NENOO'. The personality that NENOO have is he have a big heart but at the same times, he is kind of stupid and curious about anything around him. Besides that, He bring along with a flower which can hypnosis his enemies which the flower come along with he when he was born. Not only that, he also have a powerful wings which can help him fly very fast even though he is fat. The weakness that NENOO have are scare of bugs and ghost.
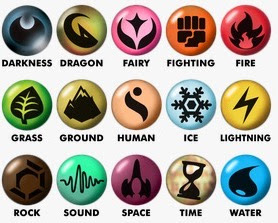
Figure 5.1: The Pokemon card templates and logo that I got it online
Figure 5.2: The process and layers that I creating Pokemon card
Figure 5.3: Final outcome of my Pokemon card
After I complete all things, Mr Hafiz bring us to FabSpace in KL to laser cut and UV print for our character. Here are some photo of it.
Figure 6.0: Photo of it
After that, I went to Mummy Design to print out my Pokemon card and here are the final outcome of the character - NENOO and Pokemon card.
Figure 6.1: Final outcome of printed character and Pokemon card


Comments
Post a Comment