Packaging & Merchandising Design's Exercise
27/08/2019 - 17/10/2019
(Week 01 - Week 08)
Fong Ee Xuan (0332842)
Packaging & Merchandising Design
Exercise
LECTURE NOTE
Week 01
29/09/2019
Mr Shamsul briefed us about the module and he showed us some final work of packaging. Not only that, we also having a discussion about packaging is about.
LECTURE 01: HISTORY OF PACKAGING
Week 02
05/09/2019
Our classmates are presenting this week about the history of packaging. Here are the presentation slides.
LECTURE 02: COLOURS AND TYPOGRAPHY IN PACKAGING DESIGN
Week 03
12/09/2019
Our classmates presented about the colour & typography in packaging. Here are the presentation slide.
Week 04
19/09/2019
We don't have class due to the haze.LECTURE 03: IMAGE AND IMAGERY IN PACKAGING DESIGN
Week 05
26/09/2019
Me and my group mate which is Vava presented the lecture today. Here are the presentation slide.
LECTURE 04: PACKAGING AND BRANDING
Week 06
03/10/2019
LECTURE 05: MERCHANDISING & VISUAL MERCHANDISING DESIGN
Week 07
10/10/2019
Our classmates presented today and here are the presentation slide.INSTRUCTIONS
EXERCISE
EXERCISE 01: BOX EXERCISE
Week 02 - Week 04
(05/09/2019 - 19/09/2019)
This week, Mr Shamsul want us to create a prototype for the object that we have brings. I bring an Abacus. So when think about abacus, all I think is mathematic and study and so on. So I create a packaging that look like a stationary kind of packaging.
Before I start, I measure the size of the abacus and I started doing some sketches for the prototype.
Figure 1.0 Measuring the size of the abacus
Figure 1.1: Sketches for the packaging (Cover)
Figure 1.2: Sketches for the packaging (Inside)
Figure 1.3: Handmade packaging
Figure 1.4: Final outcome using laser cut (Top View)
Figure 1.5: Final outcome using laser cut (Side View)
Figure 1.6: Final outcome using laser cut (Open)
Figure 1.7: Final outcome using laser cut (Separate)
EXERCISE 02 : LABELING
Week 05 - Week 06
(26/09/2019 - 03/10/2019)
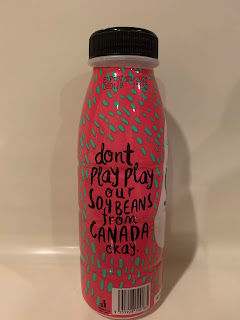
In this exercise, we have to choose a beverage that the labelling are not that good so that we can recreate the label of the product. For me, I chosen Joybean Collagen flavour. This is because the collagen that they design are too much and it is too colourful for me. So I decided to recreate the label of Joybean Collagen flavour.
I tried out many thermoforming exercises and some of it look really bad so I keep tried until my final outcome is here.
Figure 2.0 The Joybean packaging
Figure 2.1: Icon that I used for my new labelling design
Figure 2.2 Collagen that I used in the labelling design
Figure 2.3: Barcode that I used
Figure 2.4: Joybean's Logo
After I search for the graphic elements that I going to used in my labelling design for the Joybean Collagen flavour, I started rearranged the elements. Not only that, I traced the icon from the original labelling for the instructions of opening the beverages since I cant find on online.
Figure 2.5 : Tracing the instructions of opening at Adobe Illustrator
Figure 2.6: Processes
Figure 2.7: Processes
Figure 2.8: First Attempt
Figure 2.9: Second Attempt
Figure 2.10: Third Attempt
Figure 2.11: Forth Attempt
Figure 2.12: Final Outcome of the Joybean labelling design
To make it more visuals, Mr Shamsul asked us to apply our labelling design on a 3D modal bottle. Hence, I online found some mockup of the bottle and here is it.
Figure 2.13: Applying on 3D model bottle
Figure 2.14: Final outcome on 3D model bottle (Front)
Figure 2.15: Final outcome on 3D model bottle (Side)
Figure 2.16: Final outcome on 3D model bottle (Back)
EXERCISE 03 : THERMOFORMING EXERCISE
Week 07 - Week 08
(10/10/2019 - 17/10/2019)
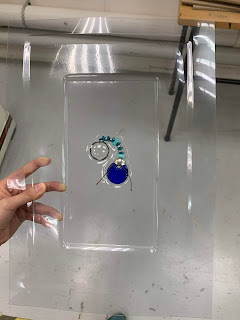
In this thermoforming exercise, we have to prepare some objects that are heat resistant, not sharp edges because we are going to heat them on 400 degrees and thermoforming it. In this exercise, I brought keychains, cutleries, highlight pen, fridge magnet and etc. Here are some photos of the thermoforming process:
Figure 3.0: Processes of thermoforming exercise
I tried out many thermoforming exercises and some of it look really bad so I keep tried until my final outcome is here.
Figure 4.0: Final outcome
Figure 4.1: Final outcome in different angel
Figure 4.2: Final outcome in different angel
FEEDBACK
Week 02
(05/09/2019)
I showed my prototype to Mr Shamsul in Facebook and he gave some comment about it. He said it looks okay for my prototype and he said the box is looking the product quite firmly. Not only that, Mr Shamsul suggested me not to use model board because the board will crack when I fold it.
Week 03
(12/09/2019)
Mr Shamsul suggested me to do the laser-cut again because my cover can't be close. Mr Shamsul also told me that the material that I had choose are good because it won't crack when I fold it.Week 04
(19/09/2019)
No feedback for this week due to haze.Week 05
(26/09/2019)
After showing Mr Shamsul my labelling exercise, he gave so comment about it which he think the directions of opening the bottle should be placed in somewhere there are eyes catching. Not only that, he suggested me to come out with more colour and many work more on the quote.
Week 07
(10/10/2019)
Mr Shamsul gave me some comment about thermoforming exercise. He told me that my plastic sheet are too thin so it is hard to make a nice shape.


Comments
Post a Comment